VMS - Video Preview (Live View)
Here's where you can see all the action.
To add a camera to the live view,
-
drag a camera from the list at left and drop it into a channel window, or
-
click a window to select it and then double-click a camera.
To remove a camera from a channel window,
-
hover over a channel and select the Close Channel
 icon, or
 -
right-click on a channel and select Close Channel from the menu, or
-
click the Close All
 icon on the tool bar at the bottom.
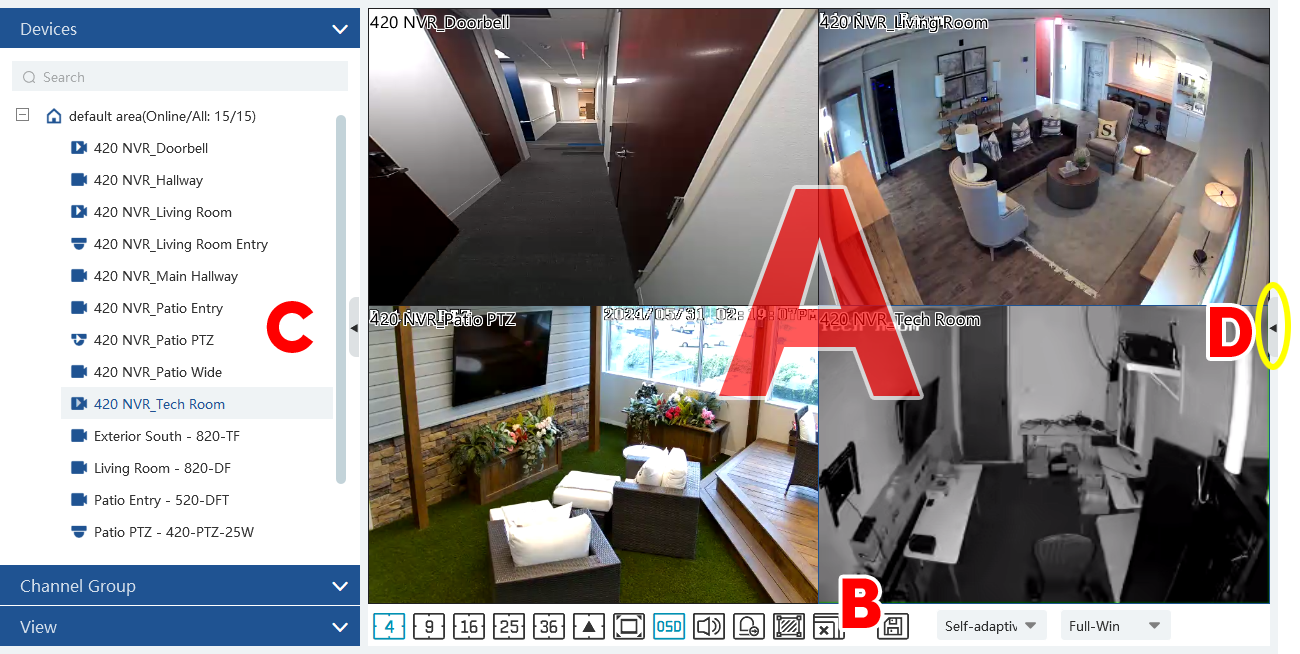
The video preview is divided into four major sections:
-
The Main screen, which shows all the camera channels.
-
The Bottom Toolbar, which helps you control the system.
-
The Left panel, which allows you to navigate various camera options.
-
The Smart view flyout at center right, which leverages the AI capability of the cameras.
Main screen
The main portion of the screen shows the camera views that you have loaded. Click on any channel window to select it.
While the bottom toolbar is the main control interface, the main screen has two additional control tools: a toolbar that appears when you hover over a channel, and a menu that appears when you right-click a channel.
Channel window toolbar
When you mouse over an active channel, this toolbar below appears at the bottom of the window. Not all icons appear on all cameras.

-
Close the channel feed for privacy.
-
Toggle recording the channel. A red camera appears in the top right of the channel to show it is recording; the file saves to the designated downloads folder on your computer.
-
Take a snapshot.
-
Toggle audio for the channel. The platform only can enable audio in one window at a time.
-
Toggle two-way audio between the DVR/NVR and the monitor client.
-
Toggle two-way audio between the IPC and the monitor client.
-
Open a Main screen.
-
For select PTZ cameras, 3D zoom.
-
For motorized cameras, zoom in and out.
-
Fit the feed to window.
-
Manually activate the channel's alarm.
-
Device settings.
Right-click menu
When you right-click on an active channel, the following menu options appear.
Close Channel: Close the video feed for privacy.
Window Scale: Adjust the aspect ratio.
Project Onto: Open the chennl into a floating window on a different monitor.
Close the Sub-screen:
Start/Stop Record: Control whether the channel gets recorded.
Instant Playback: When selected, choose how far back you want the playback to start. That channel's recordings played from that time.
Snapshot: Take a snapshot.
Audio On/Off: Toggle audio for the channel. The platform only can enable audio of one window. If the audio is enabled in one window, the audio in previous window will be disabled.
Start/Stop Talkback: Toggle two-way audio between the DVR/NVR and the monitor client.
PTZ Control: Open a Main screen.
Manual Alarm Out: Select and trigger an alarm output device.
Stream: Choose a video stream to display in this window.
Channel Info.: Display the channel's name, IP address, and the current stream.
Image Adjustment: Set the image’s brightness, saturation, contrast, etc.
Full Screen: Display the channel in full screen.
Bottom Toolbar
-
The numbered set to the left lets you select multicamera views (2×2 through 6×6). Click the up arrow to view additional options, including widescreen modes up to 48 cameras and standard modes up to 100 cameras.
-
Enable fullscreen mode on the selected camera. To exit fullscreen mode, press the Esc key or right-click and select Exit Full Screen..
-
Enable/disable OSD on the selected camera on the selected camera.
-
Enable/disable broadcast on the selected camera.
-
Manually activate the alarm on the selected camera.
-
Show/hide the target tracking box on the selected cameras.
-
Close all video feeds for privacy.
-
Save the current view mode
To the right of the buttons are two dropdowns.
-
Stream selection dropdown: This affects all cameras currently on the screen. Select main stream, sub stream, third stream, or self-adaptive stream. If third stream is selected, the system automatically switches to sub stream if the channel or camera doesn’t support third stream.
-
Aspect dropdown: Force the video to 4:3, 16:9, its original aspect ratio, or full size as needed.
PTZ control panel
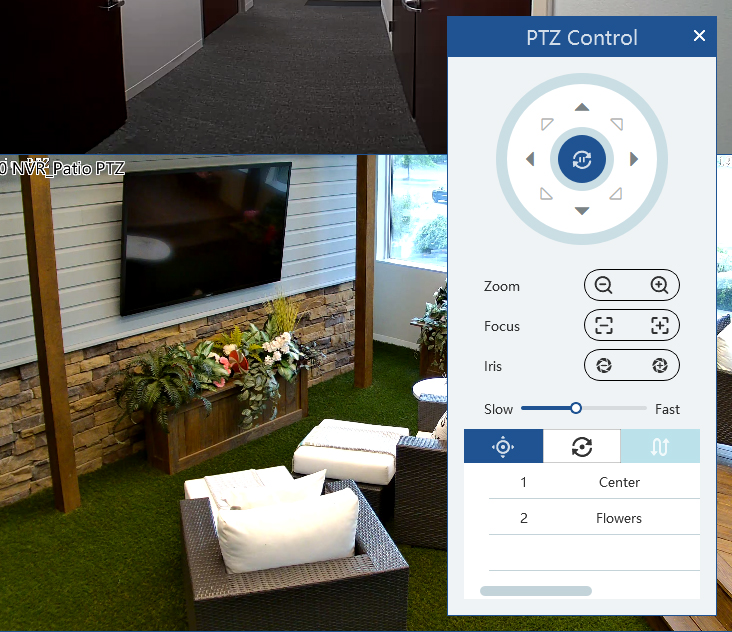
This popup gives you control over a PTZ camera. The rosette aims the camera. You can also set camera speed, zoom, focus, and iris. Finally, at the bottom, you can call a preset or cruise, and control the track function.
Left panel
The left side of the live view has three sections.
Devices
This lists the various cameras linked to the account, sorted by area. You can click and drag these into a VMS channel in the main area.
Channel group
This lists the various groups you have set up under the channel group settings (Home > Resource Management > Channel Group Setting). The +/- box beside the group name displays and hides the cameras of that group. Note that group scan also have subgroups associated with them.
Start a channel group view as follows:
Display all channels of the group: Choose a grid mode to fit the channel group. Select a window, then double-click the channel group name. All channels in that group play in the display.
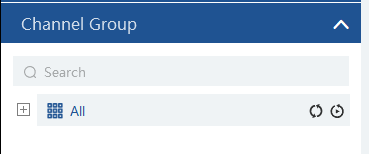
Display the group in sequence: Select an individual window. Hover over a group name to make the refresh and play icons appear. Click the play icon beside the channel group name to play all channels of the channel group in the selected window sequentially. (If the parent group has only one subgroup, this also plays that one subgroup.)
Display subgroups: If a parent group has several subgroups, click the refresh icon next to the parent group name. The system the cycles through each subgroup, adapting the grid mode to the quantity of channels in that subgroup. It also adds icons to the lower right of the window that allow you to skip to the next subgroup, return to the previous subgroup, or pause and resume automatic cycling.
There are three ways to stop group view:
-
Place the cursor on the auto-switch window and then click the X.
-
Right click the selected window and then click “Close Channel”.
-
Click the Close All Channel Views icon on the toolbar of the live view.
View
Documentation forthcoming.
Smart view flyout
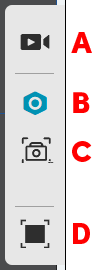
Click the small left arrow at the center right of the screen to open the Smart View tools.
-
Preview mode: This closes the smart mode flyout.
-
Smart Mode icon: This is not a functional button. It shows blue if smart mode is active, or black if not.
-
Smart Snapshot: View and filter surveillance snapshots. See below for more.
-
Full-screen toggle.
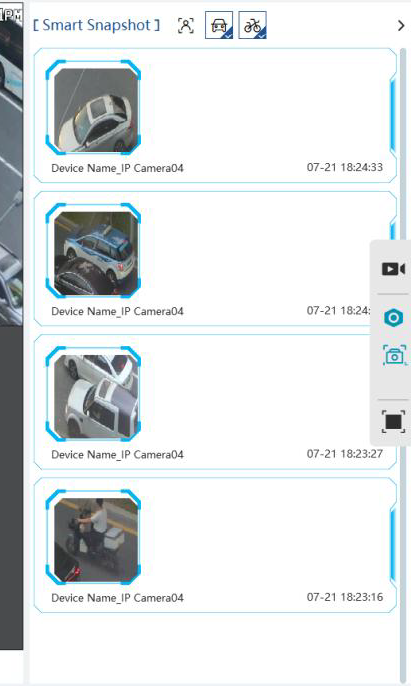
When you click the smart snapshot icon, a new panel appears with all snapshots taken. At the top are filters for human, motor vehicle, and non-motor vehicle.
If you need to see more photos, click the right carat button next to the filters to go to the smart snapshot retrieval page (use the Navigation bar at to return to the live view).
